OTHER
Classification
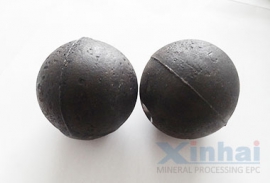
High chromium alloy casting ball, medium chromium alloy casting ball, low chromium alloy casting ball
Application
Casting steel ball is mainly used in cement plant, chemical plant, power plant, quartz sand factory, silica sand factory and other dry grinding field.
Advantages
Cost-effective and low cost, wide application range, especially in cement industry as the representative of the dry grinding field
Production Process Flow of Casting Steel Ball
Inspection of raw materials----Materials ratio---Heating and melting of Intermediate frequency furnace---Pouring into mold--- Quenching----Tempering----Testing---Package
Quality Detection and Standard of Casting Steel ball
The standard chemical components of casting steel ball.(We can also produce the steel ball according to the requirement of customers
| Code | Chemical Composition(Mass Fraction),℅ |
| C | Si | Mn | Cr | Mo | Cu | V | Ti | P | S |
| ZQCrG1 | 2.0-3.5 | ≤1.0 | 0.5-2.5 | 10-16 | ≤1.0 | ≤1.0 | ≤0.3 | ≤0.15 | ≤0.1 | ≤0.1 |
| ZQCrG2 | 16-22 |
| ZQCrG3 | 22-28 |
2.Nominal diameter, allowable deviation, the maximum diameter and the minimum diameter
| Nominal diameter | 20 | 25 | 30 | 40 | 50 | 60 | 70 | 80 | 90 | 100 |
| Allowable deviation of diameter | +2.0 -1.0 | +2.0 -1.0 | +3.5 -1.0 |
| Difference of the maximum diameter and the minimum diameter | ≤1.8 | ≤2.4 | ≤3.0 | ≤3.6 | ≤4.2 | ≤4.6 |
3.Mechanical Property of casting steel ball
| Code | Surface Hardness | Impact Test | Impact Fatigue Life |
| ZQCrG1 | ≥58 | ≥3 | ≥10000 |
| ZQCrG2 | — | — | — |
| ZQCrG3 | — | — | — |
Notes:1. The ball with diameter 100mm is used in impact fatigue test; the test height is 3.5m; the impact times of the ball with other diameter are calculated by this formula, Nx=N*100/D, N is time.
2. The impact toughness and impact fatigue life index is not treated as delivery basis.
Surface Quality
1. It is not allowed that crack, obvious porosity, slag inclusion, shrinkage, cold insulation, wrinkled skin and other casting defects exist on the surface.
2.Allowed defects on ball surface
| Nominal Diameter | Allowed Surface Defects mm |
| Spare Part on Gate | Sand Dipping Area | Residual Side | Depth | Single Hole Area | Total Area |
| 20—35 | 1.5 | 16 | 1.5 | 1.5 | 12 | 25 |
| 40—60 | 2.0 | 25 | 2.0 | 2.0 | 16 | 35 |
| 70—100 | 2.5 | 36 | 3.0 | 2.5 | 20 | 50 |
Internal quality
It is not allowed that crack, obvious porosity, slag inclusion, shrinkage, cold insulation, wrinkled skin and other casting defects exist on the section which goes through center of gate and sphere.
Test Method and Rules
1.Impact test: cutting 10mm×10mm×55mm part through gate in ball as sample
2.Rockwell hardness specimen preparation: The surface of the ball takes the test after grinding to platform, and the grinded thickness is 1.5 - 5mm.
3. Chemical composition test: when the volume smelting furnace more than 0.5 tons, we should check the chemical composition furnace by furnace; when the volume smelting furnace not more than 0.5 tons, we should check the chemical composition once per shift. Once there is one furnace unqualified, we need to sample double furnace for test. If there is still one not qualified, this branch of balls is unqualified.
4. Surface hardness test: sampling from different location of each batch of heating furnace, the number of the ball≥ 5.Once there is one unqualified, we need to sample double balls for test. If there is still a ball not qualified, this branch of balls is unqualified.
5. Internal quality detection: we sample 1 largest size casting iron grinding ball in 100 tons the same type cast iron grinding ball of each continuous production. Once there is one unqualified, we need to sample double balls for test. If there is still a ball not qualified, this branch of balls is unqualified.

 marketing@ytxinhai.com
  0086 13810327080





 CHAT
CHAT MESSAGE


